How To Ward in League of Legends As Bot Laner (2026)
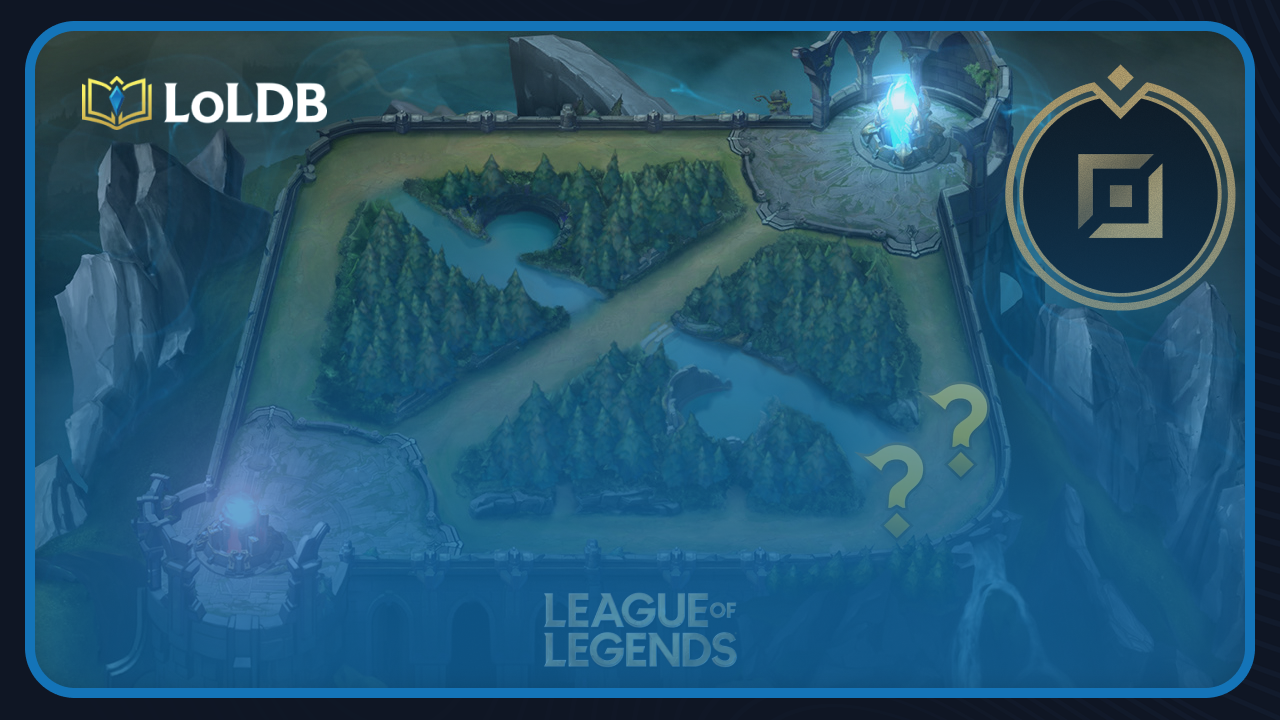
Warding as a Bot Laner in League of Legends is one of the most important habits you can build to survive the laning phase and control the objectives closest to you. Vision in the bottom side of the map directly impacts your safety, your Jungler's gank success rate, and your team's ability to contest Dragon. Here we'll explore the best ward locations for Bot Laners on both blue and red side, covering how to ward when you're winning, even, or losing your lane and you can take a look in ward skins.
Types of Vision and Items
Wards clear the fog of war. Vision can also be granted through champion abilities and specific items, not just wards.
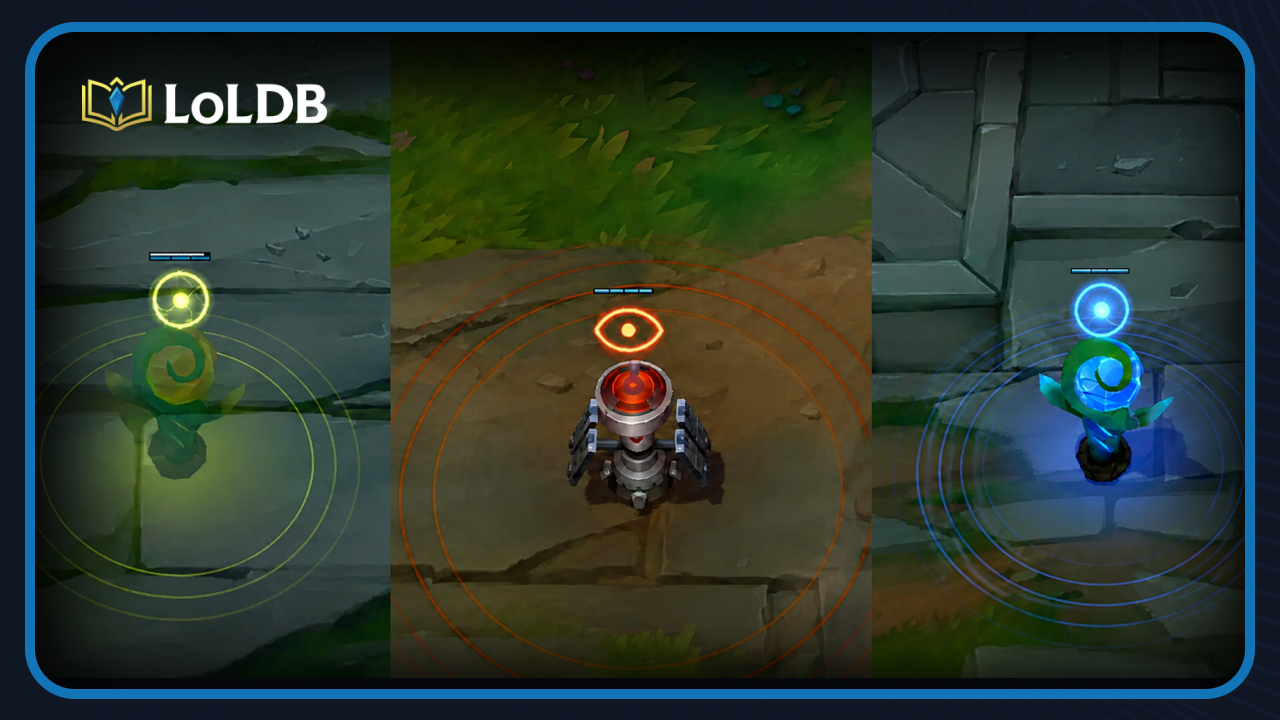
Players start with one of two trinkets
Warding Totem: The standard choice for most champions to secure the early laning phase.
Oracle Lens (Red): Used to deny enemy vision. Junglers and Supports pick it up during the mid game.
1- Stealth Wards
Stealth Wards are invisible, have 3 HP, and allies can teleport to them. Their lifespan starts at 90 seconds and scales up based on the team's average level. They can only be revealed or destroyed via Control Wards, Oracle Lenses, or before they go invisible. A player can only have 3 active Stealth Wards on the map at once. Placing a 4th automatically destroys the oldest one.
2- Control Wards
Control Wards have 4 HP and no time limit — they last until destroyed by an enemy or replaced. Each player can only have 1 active Control Ward on the map at a time, with a maximum of 2 in inventory. They reveal and disable enemy wards, reveal invisible traps, and spot camouflaged champions like Evelynn and Twitch, but do not reveal true stealth champions like Akali.
Everyone must buy Control Wards, not just Supports. Solo laners should place them in high-traffic areas or around objectives. Pro players always return to lane with at least 1 Control Ward and replace them dynamically as the map state changes.
3- Oracle Lens
The Oracle Lens activates a drone around your champion for 10 seconds that reveals and disables enemy wards and traps. It also shows the silhouettes of hidden enemies or traps inside bushes and behind walls, preventing dangerous face-checks. Disabled wards only see the champion attacking them, allowing you to bypass or clear them without fully revealing your position.
Supports must swap to it immediately after completing their support warding quest. It is not recommended at level 1, where the Warding Totem is the better choice.
4- Farsight Alteration
The Farsight Alteration (Blue ward) unlocks at level 9 and can be placed from a very long distance of 4,000 Range. It reveals the targeted area for 2 seconds and any champions inside for 5 seconds. Unlike standard wards, Blue Wards are visible to enemies, have only 1 HP, and last indefinitely until destroyed.
It is primarily used by ADC, Mid, and Top laners for safely scouting Baron or Dragon from a distance, and for checking dangerous bushes when enemies are missing.
Warding and Positioning at Level 1
At level 1, before minions spawn, each role has a designated scouting position to spot enemy invades. Standing in your designated level 1 scouting spot gives you vital map information without wasting your first ward early, as pre 1:25 vision is usually wasted. Proper early positioning also prevents you from walking into blind bushes after leashing, saving your Flash before the lane even starts.
When playing against hook champions like Blitzcrank or Thresh, stand in your spot until you spot them, then drop a ward to track their movement as you retreat safely.
Also Read: League of Legends ADC Tier List
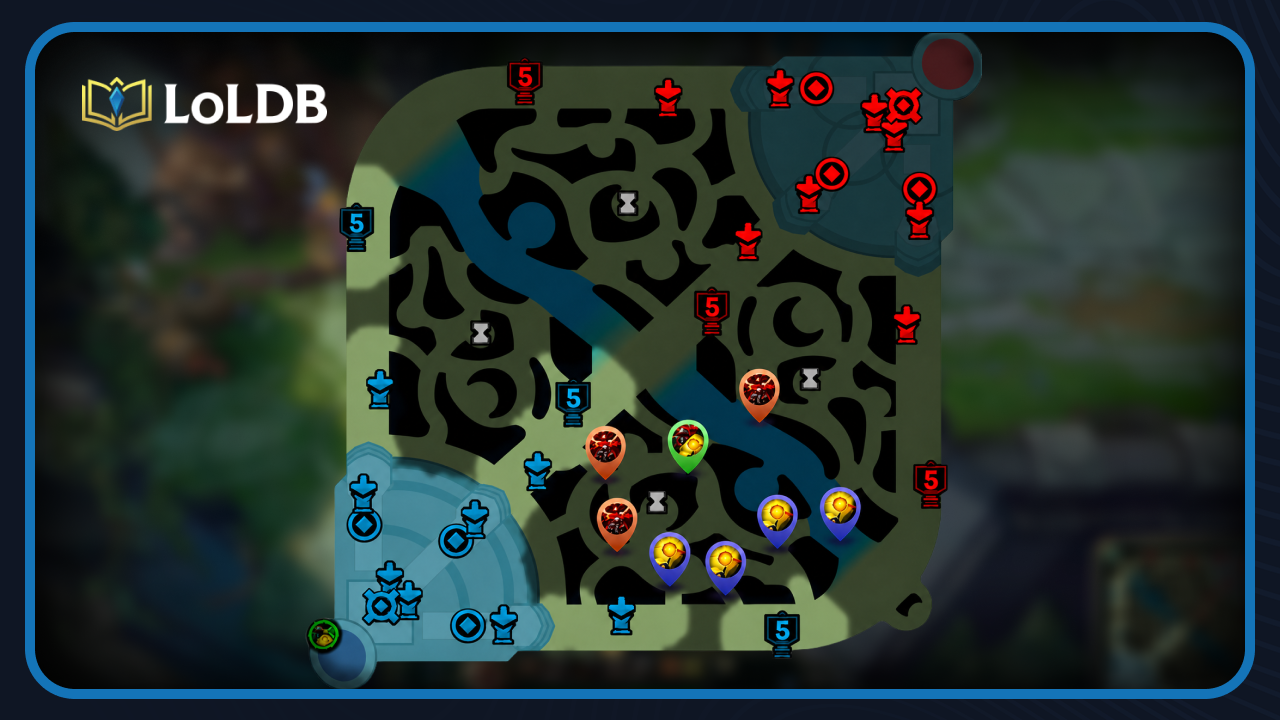
How to Ward Bot Lane as Blue Side
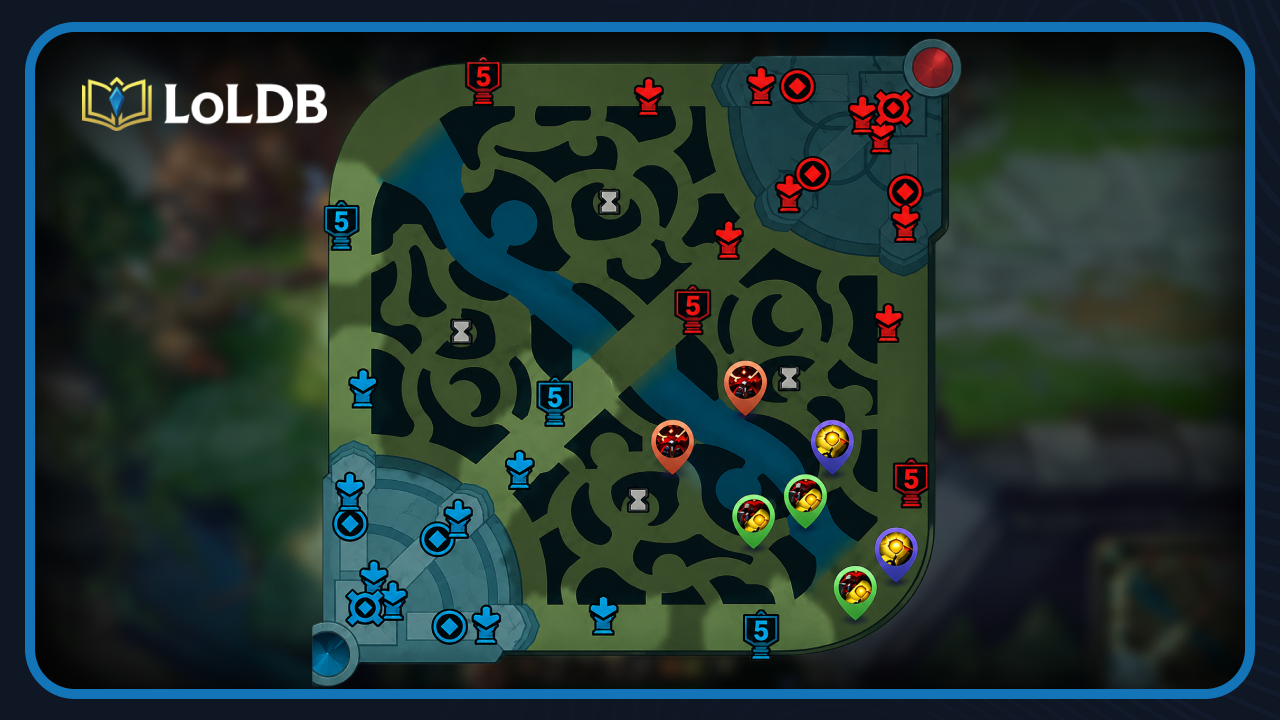
Early Game
As the Blue Team Bot Lane, your primary goal is to secure safety for you and your lane partner while providing deep information for the rest of your team. Keeping consistent vision directly in the river is vital, as it immediately tells your team if the enemy Jungler is taking the Scuttle Crab or if the enemy team is attempting to start Dragon.
Placing Control Wards strategically in the river corridors gives your team an early warning system against jungle invades and enemy roams toward your Mid laner.
Control Ward Placement Rules
Never place a Control Ward in the river bush if you are being pushed into your tower. The enemy will instantly spot and clear it, wasting your gold. Only place aggressive Control Wards in the river or lane when you have the lead and are actively pushing the wave forward. Unlike the top lane, you must keep vision inside the bot lane bushes at all times. Enemy Supports frequently use these bushes to set up surprise engages, and a ward there gives you the reaction time to back off before they can reach you.
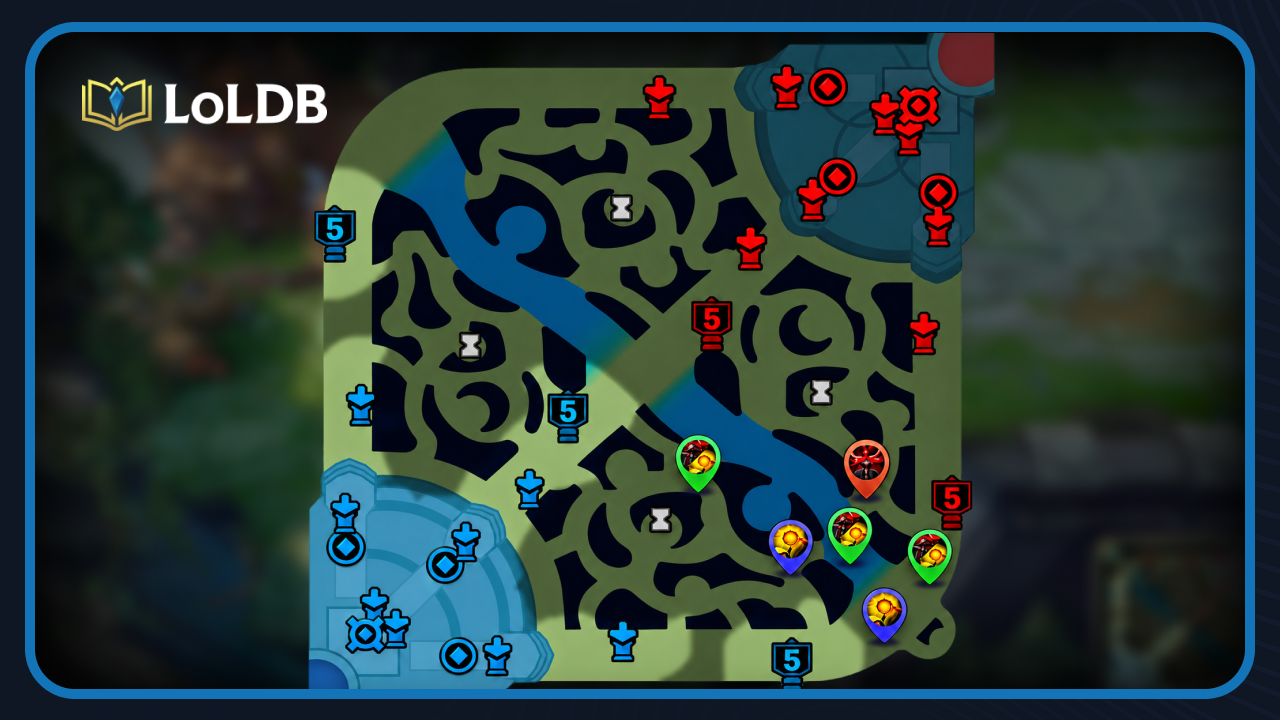
When Winning
Once you are winning the lane, shift your focus to a mixture of even and deep wards inside the enemy's bottom-side jungle. This deep vision lets you spot Mid laners or Junglers rotating down to assist the enemy Bot lane, and allows you to see the enemy Bot lane the moment they leave to roam, so you can either match their movement or punish them by taking towers and objectives.
Smart deep ward placement in enemy territory must prioritize early warning. Place wards far enough out to give you time to back off long before the enemy can close the distance. Never place Control Wards in obvious, open areas while pushed up. In deep enemy territory, Control Wards must be placed strictly inside bushes to protect them from casual clearing.
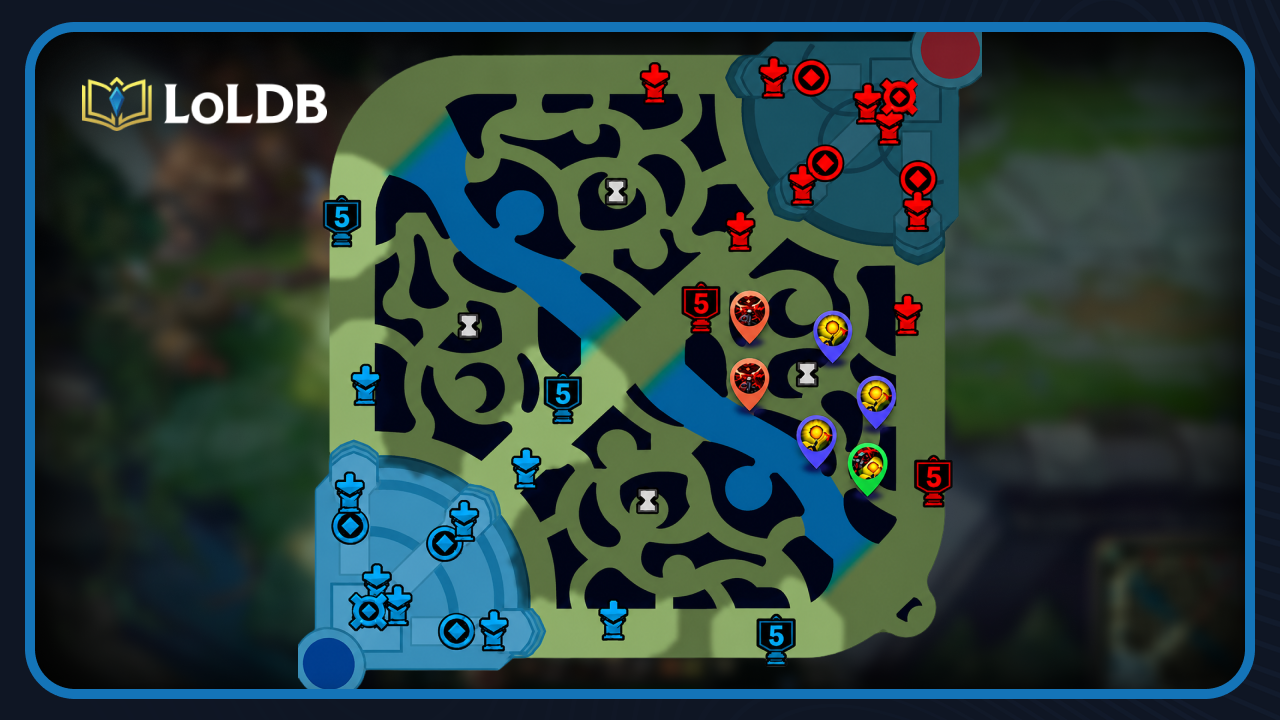
When Losing
When you are losing lane, stop placing Control Wards in the river bush. The enemy will instantly clear them, making it a wasted 75 gold that accelerates their lead. Shift entirely to defensive vision.
Place your Control Ward inside your own bottom-side jungle bushes. This tells you immediately if the enemy Bot Lane or Jungler is rotating through your jungle to invade, steal camps, or dive your tower. Use your Trinket Wards to cover the river entrances closest to your tower, and never walk past your tower to ward — only place wards from a safe distance and retreat immediately after.
Also Read: How to Get Better at League of Legends
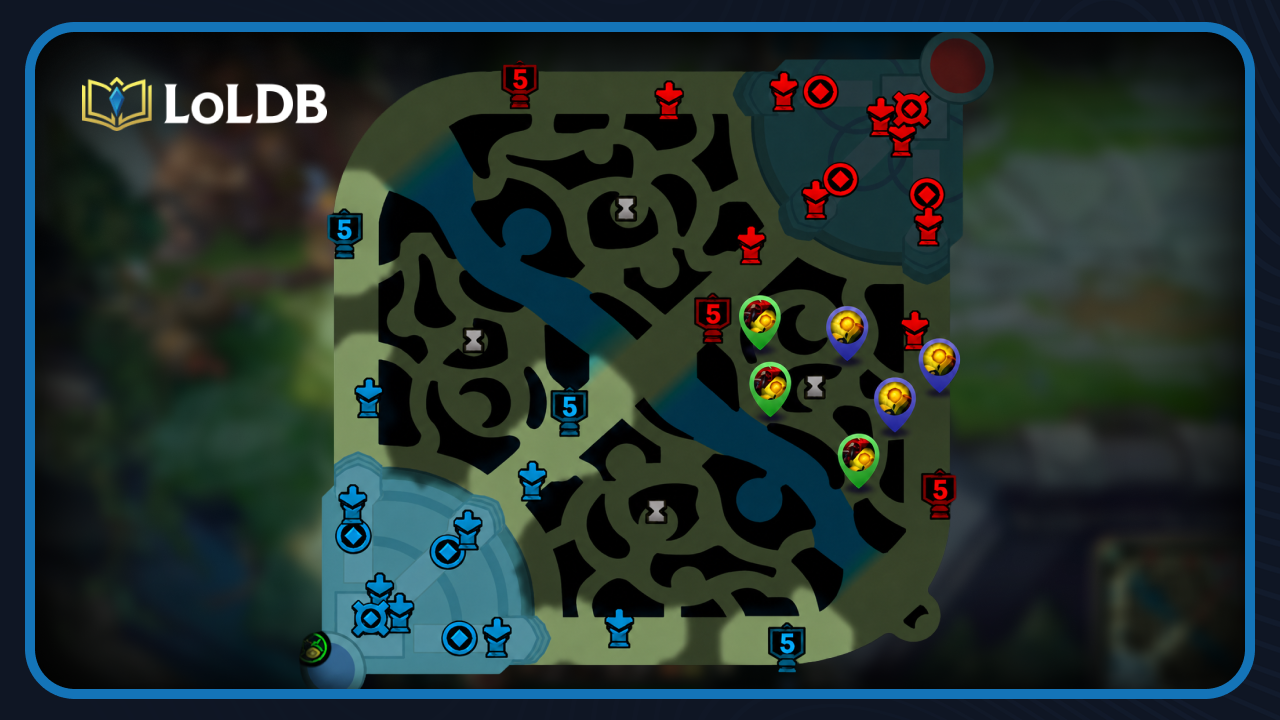
How to Ward Bot Lane as Red Side
Early Game
While the general warding patterns for the Red Team Bot Lane look similar to the Blue Team, there are specific architectural differences between the two sides of the map. You must recognize these nuances to place your wards effectively in the correct spots for the Red side.
Early in the game, prioritize equal-terms vision focused on essential coverage around your lane and river. As the game progresses, transition to a wider vision setup to control the map and objectives.
When Losing
If your lane is lost, pull your vision back. Warding your own jungle is crucial to prevent the enemy from snowballing further and to protect your Jungler from falling behind. By lighting up your own bottom-side jungle, you provide your team with early warnings if the enemy is invading to steal camps or buffs. The two wards placed in the middle of your jungle cover high-traffic ambush zones where enemies frequently hide. Lighting up these areas removes their element of surprise and gives you the information needed to formulate a counter-plan.
When Winning
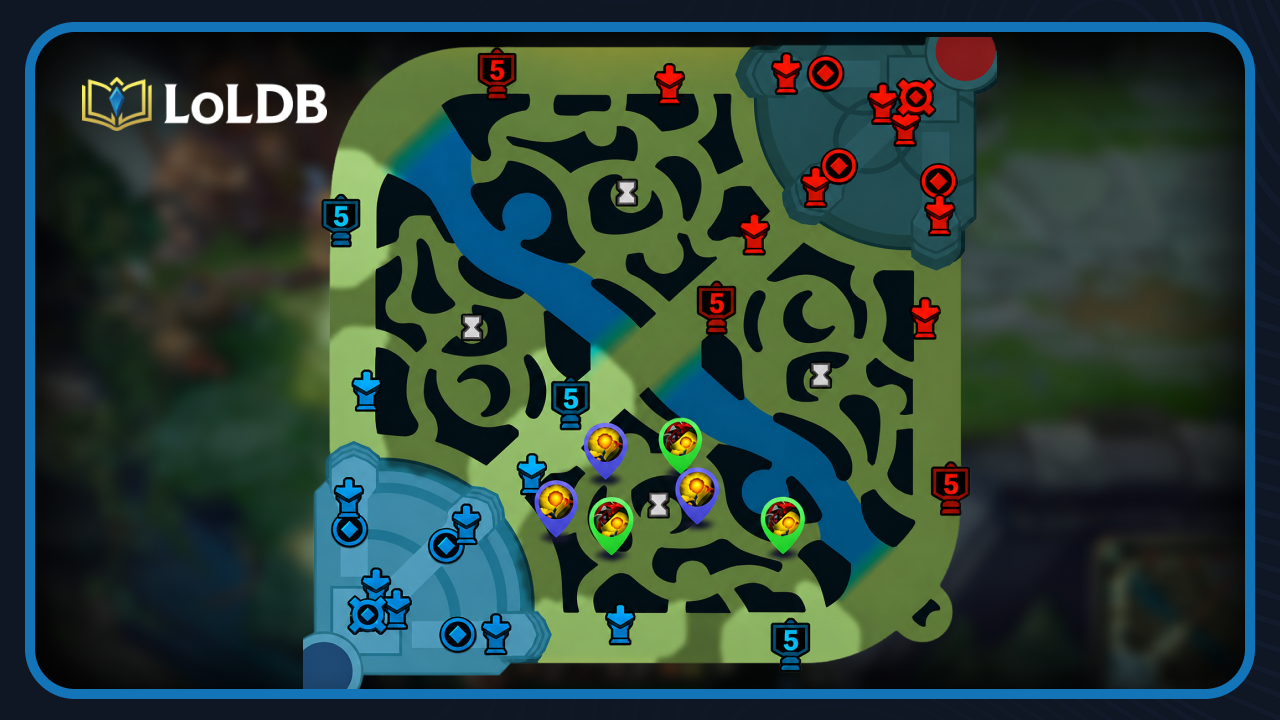
Once you gain dominance in the lane, shift from defensive jungle coverage to proactive, deep vision inside the enemy's jungle. Placing these wards allows you to spot incoming enemy Jungler movements toward your lane long before they can impact the game. Depending on your matchup and lead, placing an aggressive Control Ward in a high-traffic bush within the enemy jungle is a strong power move. Even if you are not completely dominating your lane, this specific high-traffic zone acts as an early-warning alarm, buying you just enough time to back off and escape safely if needed.
Also Read: What is Lethality in League of Legends
Final Words
Warding as a Bot Laner is essential for surviving the early game and controlling nearby objectives. The Dragon pit and river entrances are your highest priority ward locations, providing early gank warnings and vision around one of the most contested objectives in the game. Consistent vision on the bottom side of the map directly improves your safety and effectiveness in lane.

Want to explore more? LoLDB has everything League of Legends. Browse champions, skins, mythic shop rotation, current sales, and much more!

How Many Times Did T1 Win the Worlds?
T1 is a South Korean esports organization best known for its legendary League of Legends team. They are the most successful team in LoL history, with T1 having won...
How to Change Language in League of Legends
Since its launch in 2009, League of Legends has become one of the most popular games. With a roster of over 170 champions, the game continues to captivate millions...